Managing emails efficiently is essential for businesses and individuals who handle multiple email accounts. With cPanel's Email Filter functionality, you can set specific rules to automatically manage incoming and outgoing email messages, helping you avoid spam, prioritize important email addresses, and ensure message delivery remains seamless.
In this guide, we'll walk you through the step-by-step process of creating and managing email filters using cPanel. By doing so, you can improve the performance of filters for your mail and keep your inbox organized. Zebyte Cloud and DotsDen customers can utilize this powerful tool to optimize their email experience.
Steps to Create an Email Filter in cPanel
1. Login to cPanel: Access your cPanel by logging into your DotsDen or Zebyte Cloud hosting account.
(Need help logging into cPanel? Check out this Guide.)
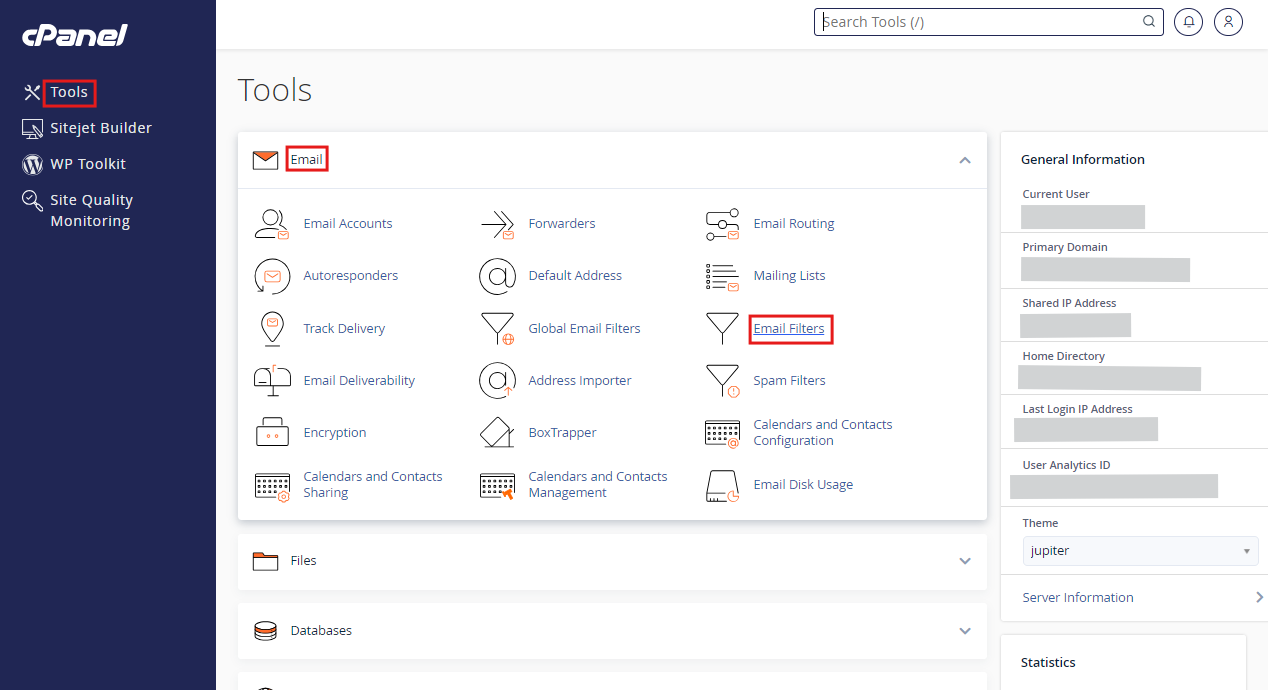
2. Navigate to the Email Section: Under the Email section of the control panel, click on Email Filters. Here, you'll find the option to create account-level filters or user-level filters.

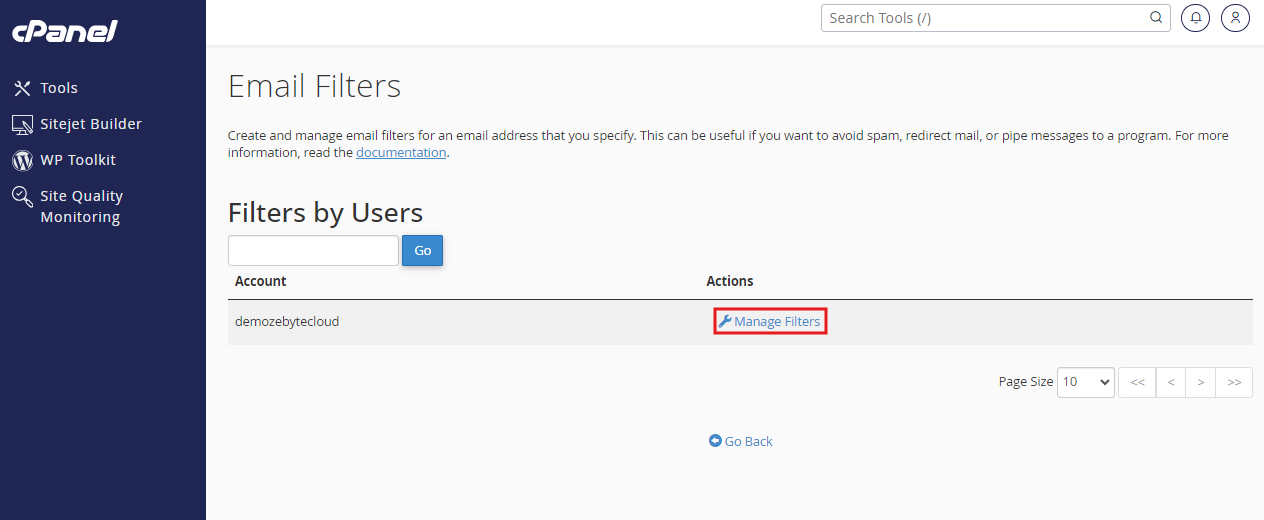
3. Choose the Desired Account: Select the email address you want to set the filter for from the dropdown menu. Whether it's a personal or business account, managing your filters at the account level is key to controlling spam and unwanted emails.
4. Click on Manage Filters: To set up a new filter, click Manage Filters next to the email account. This will direct you to the Email Filter setup interface, where you can start defining filter rules.

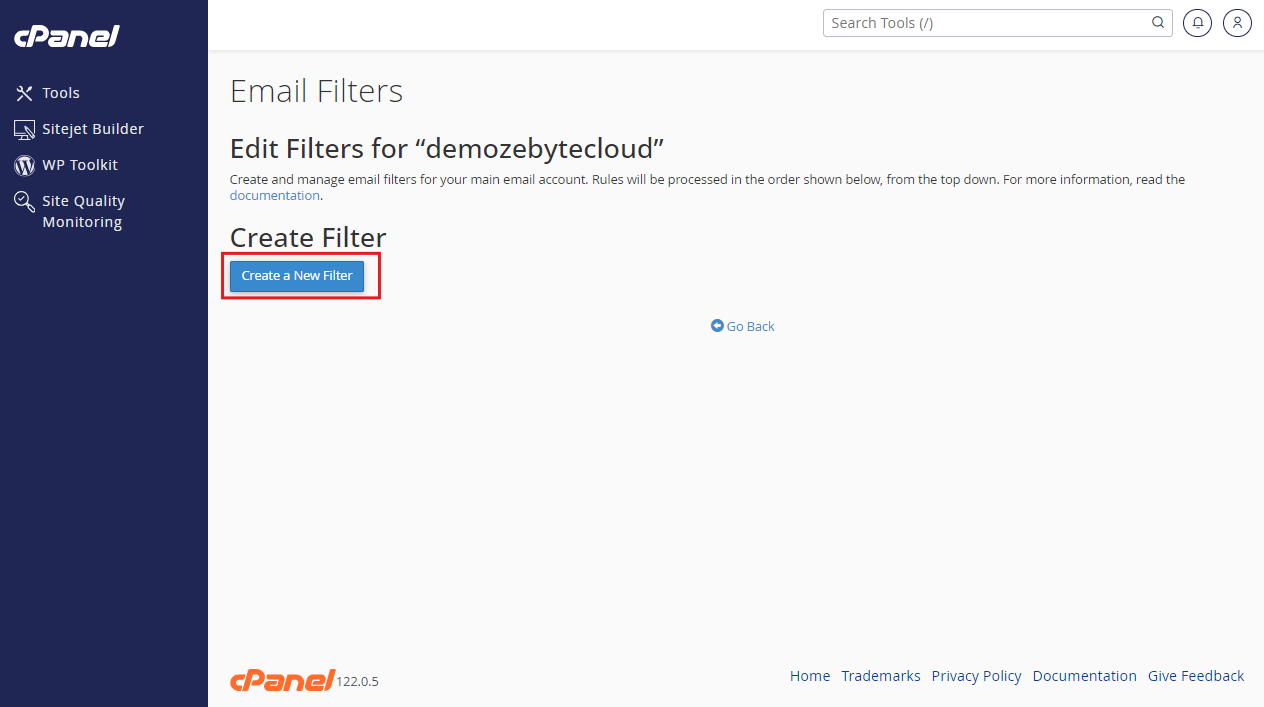
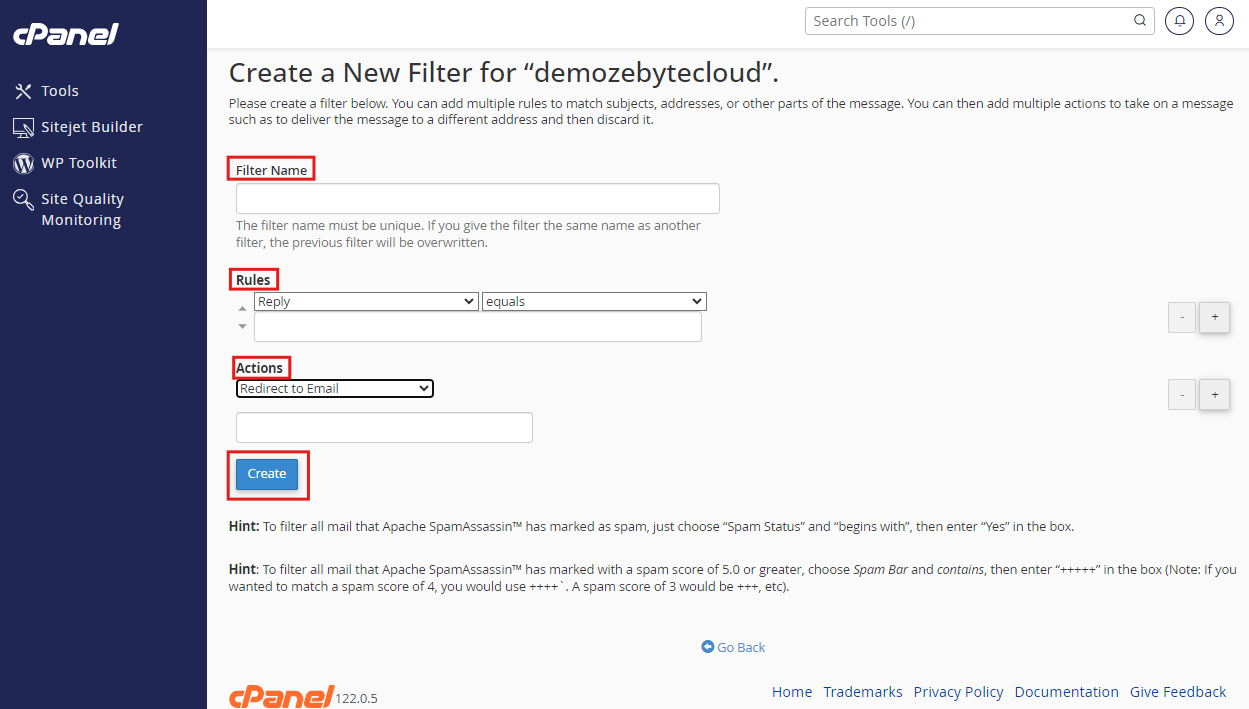
5. Create a New Filter: Click Create a New Filter. You will now enter the filter name and specify the filter conditions or rules. Examples of rules include filtering by message sender, email body, or Spam status.

6. Define the Filter Conditions: You can use several conditions for email filters to determine how incoming messages are handled. Use the Operators menu to define the type of comparison, such as "contains," "matches," or "begins with." This helps you control email delivery based on specific criteria fields such as the message headers or the email body content.
7. Set the Filter Actions: Once the filter rules are configured, you can specify actions like discarding the message, forwarding it to another email address, or sending a custom bounce message. Review the actions as conflicting filters or bad filter rules could cause errors in normal delivery.
8. Save the Filter: After setting up the desired filter options, click Create. A confirmation message will appear indicating the filter has been created successfully.

Managing Current Filters
If you need to modify or delete existing filters, simply return to the Current Filters section under Email Filters. From here, you can edit the filter parameters, such as changing the filter conditions or updating the processing rules.
Advanced Email Filter Management
For more complex filtering needs, you can create filters using advanced criteria like Regex patterns, complex filter combinations, or based on the spam score using the built-in SpamAssassin tool. For businesses using Zebyte Cloud and DotsDen, these advanced settings allow you to automate customer email management, filter mailing lists, and ensure customer engagement remains smooth without email overload.
Troubleshooting Common Issues
1. Filter Clashes: If your filters aren't working as expected, there may be conflicting filters or duplicate filter names. Make sure to review all your filters and delete any duplicates.
2. Bad Filter Rule: A common issue is configuring a filter with incorrect parameters, leading to a failure notice. Ensure that you’ve selected the right options from the Operators menu and specified the correct filter criteria.
3. Spam Folder: If your emails are not reaching their destination, check the Spam folder or configure the Spam status for a more effective junk filter.
Conclusion
By creating and managing email filters in cPanel, users can maintain better control over their incoming emails, avoid spam, and ensure critical messages reach the right inbox. With solutions like Zebyte Cloud and DotsDen, managing multiple email accounts becomes simple, efficient, and secure.
For any issues, be sure to contact your email service provider or review your filter rules in the cPanel dashboard. By regularly updating your filters, you’ll enhance the overall performance of filters and keep your email system functioning smoothly.

