Securing your email communications is crucial in today's digital environment. One effective way to enhance security is by enabling email encryption through cPanel. This step-by-step guide will walk you through the process of creating an email encryption in cPanel, using the platform's user-friendly interface.
Step 1: Access the Encryption Interface in cPanel
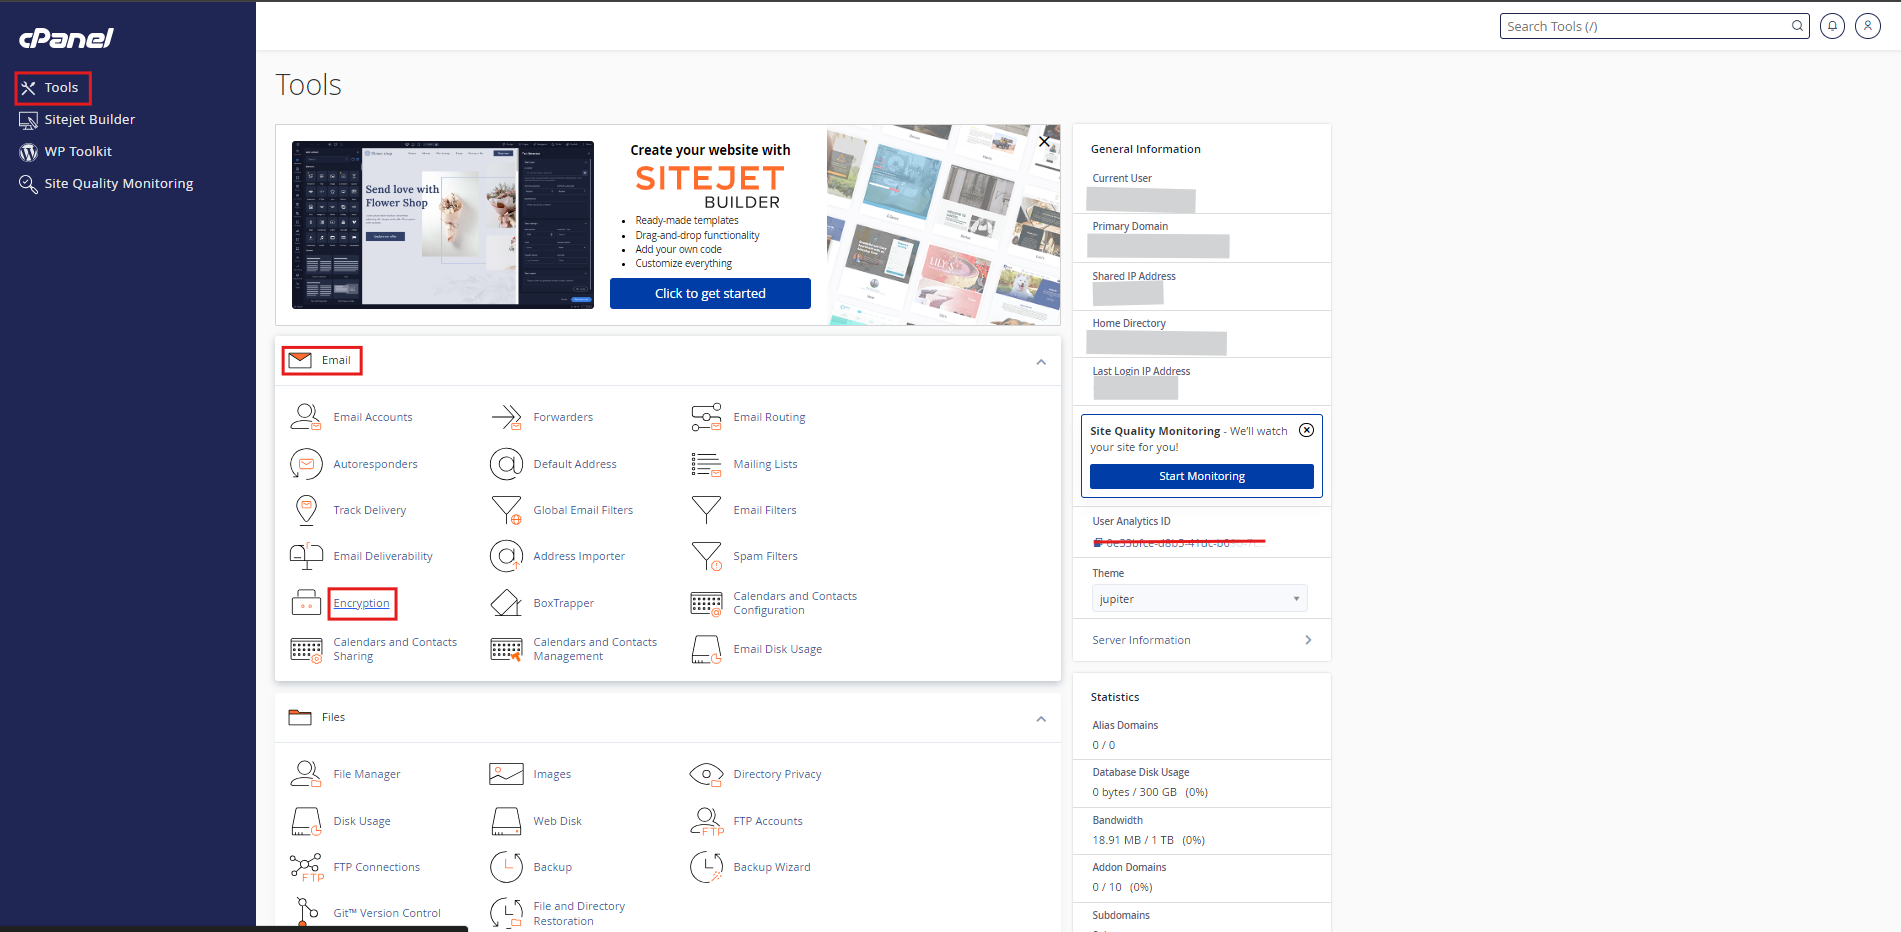
- Log in to your cPanel account and navigate to the "Tools" section on the left side of the dashboard.
(Also Read: How to Purchase cPanel Web Hosting from DotsDen?)
2. Under the "Tools" section, select "Email".
3. Click on "Encryption" to open the encryption settings.

Step 2: Creating a New Encryption Key
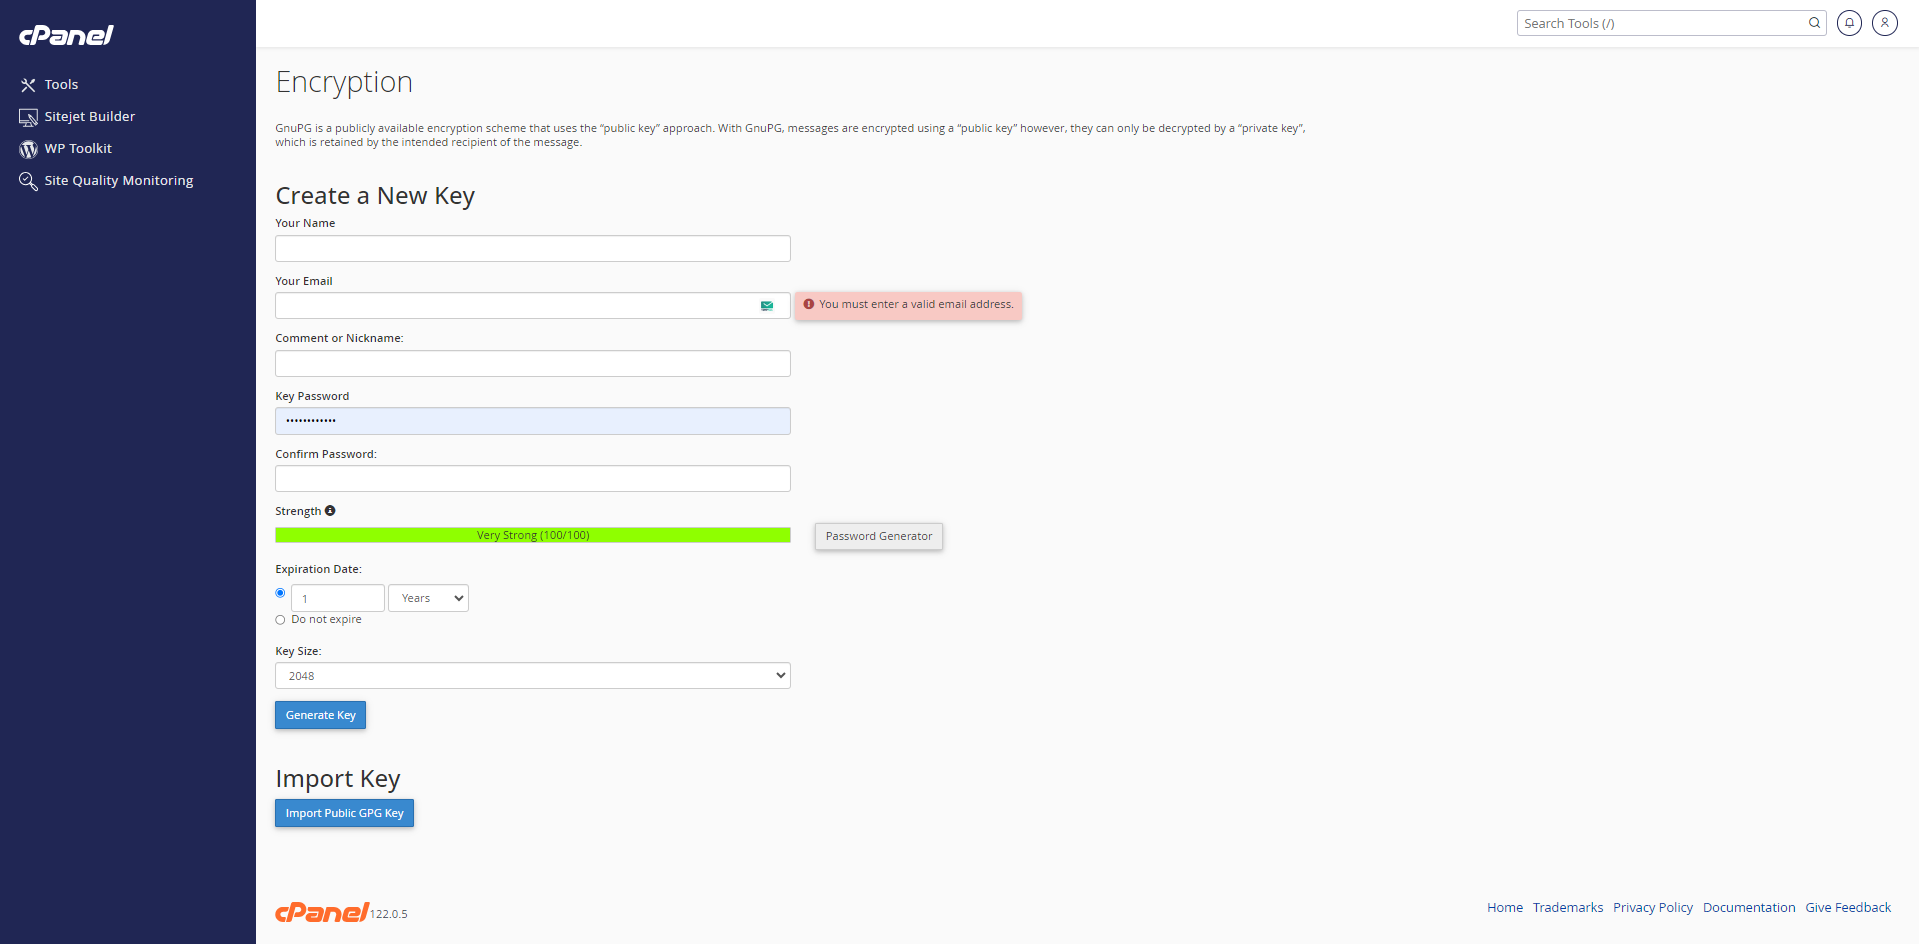
- In the "Encryption" interface, locate the "Create a New Key" section.
- Enter your name and a valid email address. Note that the system will prompt you with an error message if the email address is invalid.
- Fill in the Key Password field with a strong password. Use a combination of uppercase and lowercase letters, numbers, and symbols to ensure password strength.
- Confirm the password by re-entering it in the "Confirm Password" field
- Choose the expiration date for your key, or select "Do not expire" if you want the key to remain valid indefinitely.
- Select the Key Size from the dropdown list. The default is 2048 bits, which balances security and performance.
- Click "Generate Key" to create your encryption key.
Step 3: Importing an Existing Encryption Key
- If you already have an encryption key, use the "Import Key" section to upload your Public GPG Key.
- Click on "Import Public GPG Key" and follow the prompts.
Step 4: Configuring Email Client for Encryption
- After generating or importing your encryption key, configure your favorite email client, such as Mozilla Thunderbird, to use the key for encrypting outgoing email messages.
- Ensure that the email client is set to use encryption for all email communications and that the encryption key is properly configured in the client settings.
Step 5: Testing Email Encryption
- Send a test email message to verify that the encryption is working correctly.
- Check for a success message indicating that the email was encrypted and sent securely.

Tips for Effective Email Encryption
- Always use a secure password for your encryption key.
- Regularly update the expiration date of your keys to maintain security.
- Ensure that your email provider supports encryption and that the mail client is configured correctly.
- Store your private key in a secure location, such as a secure flash drive.
- Consider using 2-factor authentication in addition to encryption for added security.
Conclusion
By following these steps, you can significantly enhance the security of your email messages and protect sensitive information from unauthorized recipients. cPanel's encryption feature provides a robust solution for securing your email communications, making it a proactive step in safeguarding your digital assets.
For more information and detailed configuration instructions, refer to the cPanel documentation or consult your email administrator.

