Every business today is on track to get online. It is beneficial as it allows your business to be accessed by customers worldwide. However, simply creating a website is not enough. You have to keep track of the data that your website collects through visitors. Today businesses are fuelled by data. If you have the right and accurate data then it becomes easy to make informed decisions.
Using Google Analytics is the best way to get useful insights into your data from the website. Here are the steps to create and set up Google Analytics for your website so you can make better decisions using the right data.
Step 1: Create a Google Analytics Account
- Visit Google Analytics.
2. Sign in with your Google account.
3. Click on "Start measuring" to create an account.
4. Fill in your account name and data-sharing preferences.

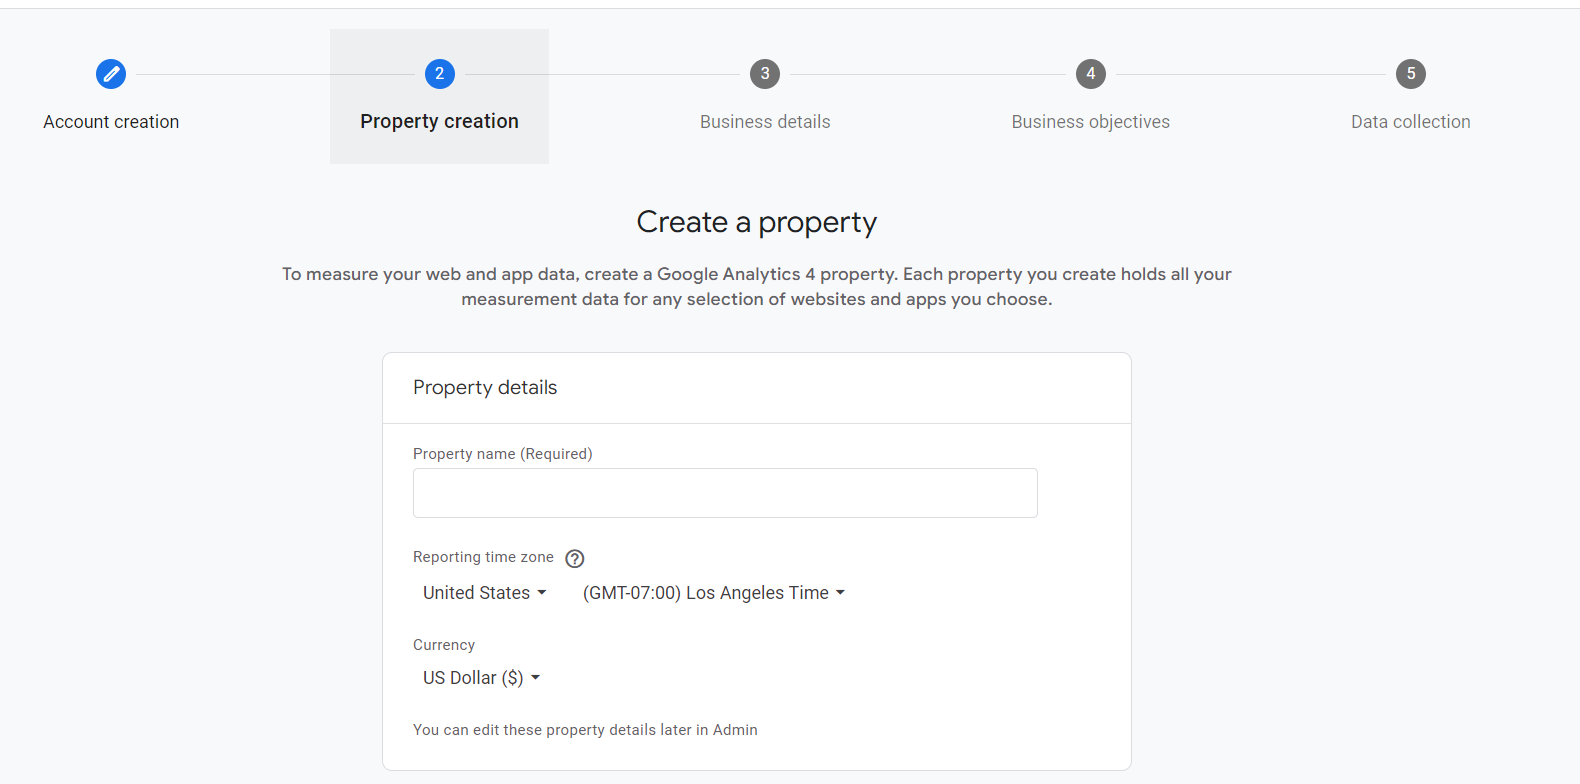
Step 2: Set Up a Property
- Add your website name and URL
2. Choose the industry category and reporting time zone

3. Click "Next" to configure additional settings
Step 3: Get the Tracking ID or Code
- Once the property is set up, you’ll get a tracking ID or tracking code.
2. Copy the code for use in the next step.
![]()
Step 4: Add Tracking Code to Your Website
Once you set up a Google Analytics account and add your website, you need to add the tracking code to the website to send visitor data to Google. This step requires the use of a tracking ID, which is in your Google Analytics account.
There are several ways to deploy the tracking code. Most of the websites usually do it through Google Tag Manager or through directly embedding the script within the website code.
Embedding Script
As mentioned above, you can directly embed the tracking code in the website’s code. This will depend on the type of website you have. The process is a little different for HTML sites, dynamic sites, and even web applications.
For HTML Sites:
You can easily embed the Google Analytics script directly within your website HTML code. To do this:
- First, you have to copy the Google Site Tag script from your Google Analytics account
- Now paste the script in the code ( before the </head> tag) of every page on your website for which you want to track visitor information.
For Dynamic Sites:
Dynamic websites are those that are generated using scripts such as PHP. You can add the script to this type of website in a more streamlined way. You do not have to embed the entire script on every page like you did in the HTML website. You just have to use an include function.
- The first step is the same to copy the script from your Google Analytics account.
- Now you have to create a file and paste the script there.
- Finally, add the script to each template page after the <body> tag;
<?php include_once(“analyticstracking.php”) ?>
For Web Applications:
Web applications such as WordPress and Joomla often offer modular features that support Google Analytics. You will generally seek a plugin or extension built for this purpose and install it in cases like this.
Once installed, you only need to provide the extension with your Google Analytics tracking ID, and it will handle the rest for you.
Step 5: Verify Installation
- After adding the code, you can verify it by going back to Google Analytics and checking the "Realtime" report to see if your activity on the site is being tracked.
- Customize Your Analytics.

